Wednesday, December 27, 2017

Story: "Florida Day" (Part 2)

I first want to take a moment to wish everyone a belated Merry Christmas and Happy Chanukah, and to send you all best wishes for the coming New Year! I sincerely wish good health, prosperity, and peace for you and your loved ones. Let's hope 2018 offers us some of each - and hopefully some great experiences on the water. 

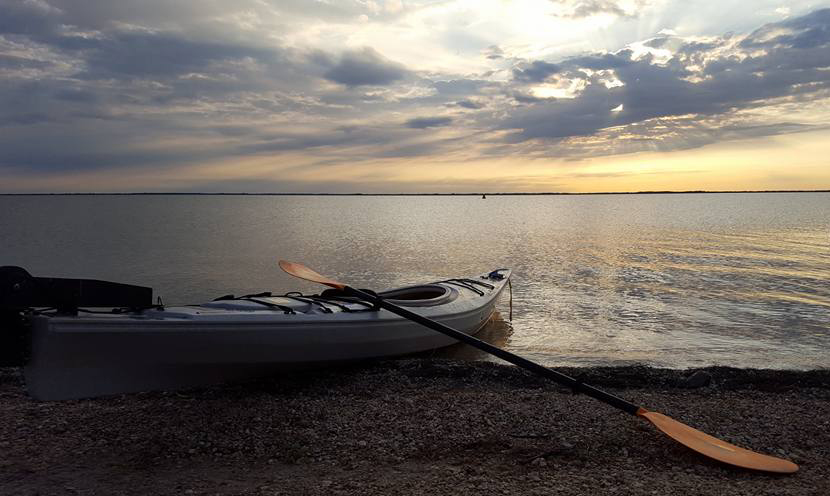
When I left off on part 1 of "Florida Day", we had just completed our paddle trip down a section of the Ocklahawa River, which borders the Ocala National Forest in central Florida - north of Orlando and west of Daytona Beach. We had a largely pleasant and uneventful paddle through the forest, with the exception of Steve's capsize (a momentary crisis) and the spotting of a very large 'gator close by on a log - which came as a bit of a surprise to Steve's son. We had survived our journey unscathed in any case, and the day was warming well past the chilly temperatures of a February Florida morning. Steve had suggested earlier that he had a place he wanted to take us for lunch - in a village that had some unusual history. We got ourselves into some dry clothes and set off.

We drove southwest (generally - there is no direct route in that direction) to the village of Ocklahawa on the shore of Lake Weir , which took about 45 minutes, maybe an hour. Steve was taking us to Gator Joe's, a restaurant on the lake with a deck and pier over the water, and an adjacent beach. I was surprised by the white sand beach leading to the water. Here in the northeast, lake shores are often rocky - and if they have sand, it is usually a darker, caramel color. It was one of these little revelations that surprises me about the Florida landscape, and that is so different from what we're used to in New England. Apparently, Gator Joe's is so named for the enormous alligator that was caught in the lake in 1952, and was known to have resided there from at least 1930. A replica of "Joe" is stationed near the entrance, and once inside the front door, you can view one of Joe's front feet under glass - it's about the size of a dinner plate.  


https://cwkayaker.blogspot.com
Lake Weir, Florida 
Ocklahawa village and Lake Weir are also known for another interesting piece of history. It was the hideout for the infamous "Ma Barker Gang" at one time - ending with a shoot out in 1935 between Ma and her son Fred, and FBI agents. Ma and Fred were both killed. The house where they stayed still remains, and is privately owned. There is a local bar just east of the village on County Rd 25, called "Ma Barker's Hideaway Bar" (more on that in a bit). 

The menu at Gator Joe's features items like chicken sandwiches and, inexplicably, Alaskan pollock fish sandwiches (why would anyone want fish from Alaska, when the ocean is an hour away? - it's a mystery to me). I like to eat what's local, so I had the fried 'gator tail. I've eaten alligator several times, and I find it a perfectly acceptable (and sometimes truly delicious) thing to eat. During lunch, Steve enthusiastically recounted what he knew of the Ma Barker history in the village, and suggested we drive by the hideout house, and then get a shot of liquor at the bar named in her honor. I replied "if they have bourbon. I'm in!".

We paid our bill, piled into the car, and headed over to the address of Ma Barker's old hideout. The architecture in the village is that great, 1930's and 40's, wooden beach houses with screen porches and often colorful trim work. Maybe they're a little ramshackle these days, but I still liked the feel of the place. Ma Barker's old house wasn't much to see - a partly rundown wooden house with a for sale sign in front. We didn't spend much time looking at it. We headed east on County Rd 25, and made our way to the bar named in her honor. There were several Harley's lined up out front, so Steve and I decided we'd go in for a quick shot of whiskey and leave the ladies in the car. I know that sounds a bit stereotypically prejudiced, but after all, this was unfamiliar territory. When we walked out of the sunlight into the dark bar, it was clear we were recognized as strangers. The bartender actually came out from behind the bar to ask us what we'd like. We asked for a couple shots of bourbon. She responded that they didn't serve liquor, only beer and wine. Steve and I looked at each other, then both nodded we should just move along. I had to chuckle to myself wondering what the wine list looks like at a roadside bar in Florida named after a criminal gang leader๐Ÿ˜‰. 

We all decided it was time to head back east to the coast, and to Steve and Kristina's place. Kristina was driving east on the 2 lane County Rd 25 about 10 minutes later, when a light colored sedan pulled up fast behind us, and ultimately passed in a no-passing section of the road. Soon after, Kristina noticed a pursuing police car coming up fast from behind. At this point, the sedan had passed a couple more cars in a similar fashion. We pulled to the right to let the police pass, then watched as the sedan veered off the road in a cloud of dust about 50 yards ahead of us. They were apparently trying to make a run for it. By the time we passed where they had exited the roadway, the dust had settled just enough that I could view the sedan, driver's side front wheel perched on top of a pile of wooden pallets, resting in a sparsely wooded field. The doors were open, and the occupants were racing off on foot in several directions. The police had just arrived and were continuing their pursuit - it didn't look good for a getaway. We laughed at how much it looked like a "reality" TV show police chase. Just then, Kristina turned to us in the back seat, laughing, and said, "welcome to Florida!".

As we reminisced over our day for the rest of the drive back, we checked off all of the Florida themed experiences we had throughout our trip: alligators? check. colorful locals? check. a police pursuit? check. This day had it all. And, that's when we decided to give it the name "Florida Day".

Sometimes, the exciting and memorable parts of a trip - even a paddle trip, are the ones least expected. Keep a sense of humor and your mind open, and your paddle adventures can be part of a bigger story...maybe one you can chuckle about when you remember it.

TB on the Water                      


Wednesday, December 13, 2017

Story: "Florida Day" - Our Florida Paddle Adventure

When winter blows in to the northeast, many folks pine for a trip down south to get some reprieve from the chill, and maybe a little sun. The link between Florida and New England is well established (check out how many Patriots fans show up at a Pats/Dolphins game), with many yankees having relocated to the sunshine state, or who take regular winter vacations there. Having visited Florida on several occasions, I have come to appreciate the state for more than the well known tourist attractions and beaches. Florida has some fantastic natural wonders; lakes, rivers, springs, the intercoastal waterway, wildlife, islands - the list goes on, but many of these features involve water. Florida, after all, is a very low lying state, with the highest point above sea level being a mere 312 feet in the peninsula, and 345 feet in the panhandle. Water is always close to the surface, and this provides an abundance of kayaking opportunities for those looking to add an outdoor adventure to their Florida vacation. A few years ago, me, my wife and some friends had such an adventure, which we named "Florida Day" before sunset.


We opted for the single kayaks - these folks took a tandem

Our friends Kristina and Steve moved from Newburyport, MA to Merritt Island near Cocoa Beach decades ago. They settled there and raised a family, and we make a point to visit them if we're nearby (we typically fly into Orlando, which isn't too far of a drive). Having notified them of an impending visit a few years back, Steve suggested we go on a kayaking excursion - something he had mentioned previously. We agreed, and we all reserved kayaks at on outfitter, the Ocklahawa Canoe Outpost & Resort. On a particularly chilly (certainly for Florida) February morning, we got a start at the break of dawn to drive the couple of hours north and west from Merritt Island to the Ocklahawa River location. I was nursing a sizable hangover, having spent far too much time at an outdoor bar in Orlando with my brother-in-law the previous afternoon. The air temperature was in the 40's (F) at dawn, and I was anxiously waiting for the sun to rise and warm the day, and hopefully for my headache to subside ๐Ÿ˜“.

There were 5 of us in total:  myself, my wife, Steve, Kristina, and their high school freshman son. We all opted for single 8' kayaks that were really more like plastic canoes, with no drain plug and a large cockpit opening with no spray skirt. I recognized immediately that if one of these boats took on water, there would be no way to empty it, short of turning it over. I hoped the Ocklahawa river was shallow enough to accommodate such an effort if necessary - turns out it wasn't. 

We piled into a van that took us and the kayaks to the launch site upriver. The owner handed us a couple of rudimentary maps and told us to basically follow the current downstream. The water looked reasonably calm as we departed, but I kept a close eye on all parties as we paddled off, me being the most experienced paddler of the group. I was looking forward to seeing some wildlife, including the chance to see one of the monkeys, left behind by a movie production, that had escaped and established a colony now living feral in the Ocala National Forest

The river varied from a width of 20-25' to maybe 40' at its widest. Depth was hard to gauge, but occasional depth markers showed 8-10'. The flow was fairly slow and meandering, but picked up some speed around tight river bends and fallen logs. We didn't see much wildlife to start, probably because it was cold - very cold for a Florida morning. Temperatures were still in the 50's (F), with the forest blocking much of the low rising sun. We landed for a quick break at the first landing spot marked on the map - a narrow, slightly muddy break in the cedar and cypress trees big enough to accommodate 2 landed kayaks side by side. This spot would be important for us in the near future.

After climbing back into the 'yaks, and heading downstream, I began to pull away from the group. Try as I might, I could not seem to paddle slow enough to keep back with them, and kept having to turn around and paddle upstream to check on everyone - the wives happily chatting as they drifted along and Steve and his son getting a bit cantankerous with each other ๐Ÿ˜’. Not too long after we departed the landing, I was ahead of the group again when I heard raised voices echoing through the trees, and the inevitable splash of water that I feared, as someone undoubtedly had gone into the drink. I heard my wife call out for my assistance, and I paddled back to find Steve chest deep in the river and straining to hold his kayak from floating on downstream. Steve was shouting a bit at his son, who, it seems, had somehow been involved in Steve's capsize.

I paddled over to Steve and coached him to get to a shallower place with a foothold so he could empty his water logged craft, but he insisted on re-entering it where he was. He miraculously got back into the cockpit, but the boat was very low in the water and unsteady. It needed to be drained, but the trees on both banks were so thick there was no place to land. I remembered the landing we stopped at back upstream, and figured it was the quickest way to get to a safe location. I stayed with Steve as he carefully paddled back, and instructed the others to follow. I dragged Steve's water laden boat onto shore, helped him climb out, then turned it over to drain the cockpit. The problem now was Steve was wet, and it was still cold out. Cold enough to be dangerous. Steve was wearing a pair of jeans and a cotton sweatshirt - not appropriate clothing for paddling (see my post 8 Tips for Dressing Right for Your Kayaking Adventure). Fortunately, I had enough moisture wicking clothing on, and I was dry, so I peeled off a layer and gave it to Steve to wear. We got ourselves sorted as best we could, and the experience seemed to wake the group into a better mindset for concentration, so we departed once again, heading downstream.

Shortly afterward, I would be thankful the capsize had already taken place, because the panic level would have surely been much higher...Steve's son was now keeping up with me at the front of the pack, and sometimes paddling ahead of me. I was keeping an eye on him, because I noticed him daydreaming a bit and not keeping his eyes on the water. During one of these episodes, we rounded a bend in the river, and I spotted a large alligator sunning itself on a log directly in front of him. He hadn't seen it yet. I estimated its head length at 2 1/2', its body at 4 1/2', and its tail at another 4-5'. All in all, I estimated its length to be somewhere between 9 and 11'. I called out "big gator straight ahead to your left". When his eyes caught hold of the animal, I saw him startle. The current was carrying us straight toward the log. I wondered what the gator would do. Fortunately, as we drifted closer, it slid heavily, but quietly into the water, and the wake of its tail swipe, even deep under water, betrayed its power. We had seen a couple of small 2' gators to this point, but this one was clearly the grandaddy of the river. I shuddered to think what the capsize scenario would have been like after we saw this beast.


Ours was a bit bigger than this one...

We paddled on for a couple more hours, stopping at another landing, this time a shallow, sandy one farther downstream. It actually had a rope swing that people use, apparently to launch into the river - yes, the same river with the large gator in it. The sun had risen higher, the temperature had climbed to at least the 60's (F), and Steve had dried out. We were all in lighter spirits as we tried to catch some lizards scurrying around a fallen log on the shore. We pulled into the final landing another 45 minutes later, having enjoyed a fun paddle adventure through the Florida forest. We never did see a monkey, though. 

As we returned our paddles and PFDs to the gear rack, the owner came out from one of the cabins and asked how the trip went. We said it went well, and then he asked (perhaps a bit too knowingly) did we see anything? I said we saw a big gator. He replied, "yep, he's a big boy for sure". When I asked how much the gator weighed, the owner thought for a moment, then said "oh, I'd expect 300, maybe 400 pounds". Yep, he was a big boy for sure.

To read the rest of the story click on "Florida Day" Part 2.


TB on the Water


Wednesday, November 15, 2017

Advice: 5 Tips for Paddling in the Bumper Seasons

https://cwkayaker.blogspot.com
Even the swans know it's time for the lakes in late Autumn  

As autumn fades to winter, and colder temperatures arrive in the northeast, the challenge for finding suitable paddling trips gets a bit more complicated. The dangers associated with lower temperatures and less daylight make kayaking an activity that requires more planning and consideration. In that spirit, here's 5 tips for enjoying late autumn (or early spring) paddling:

1. Be aware of the water temperatures. As I have stated in other posts like 8 Tips for Dressing Right for Your Kayaking Adventure and Safety is a Mindset - 10 Tips for Kayaking Safely, you must be aware of, and dress properly for, the existing water temperatures in case of an unexpected immersion. In the autumn, there is some carry over of summer water temp's in the ocean (and in larger lakes), but in the early spring, there is carry over of colder winter water temp's. Either way, the water is going to be colder than in mid-summer, and the ambient air temperature (and maybe wind chill) will be colder too. Find out what the water temperatures are in the areas you are considering, then exclude the coldest options and dress appropriately.

2. Consider Moving Inland. Flat water rivers and lakes are a better option for colder weather paddles, as are salt water marshes that meander far inland. I often save some of these areas that are on my "to paddle" list just for these times of year. You can frequently see active wildlife like migrating birds and deer in the bumper seasons, which is a bonus. There's also the benefit of paddling inland waters when the boat traffic is minimal, if any at all. Add a paddle up a historic river (see my post 5 Tips for Touring a River in a Kayak), and you will have plenty of interesting things to see.

3. Stay Close to Shore. Capsizing far from shore can be dangerous no matter the season, but in the colder weather it can be deadly. Keep close to river banks, islands, or lake edges to give yourself an escape to dry land (or just a rest spot) if it is necessary.

4. Absolutely Bring a Dry Change of Clothes. If you get wet, you will need to get dry ASAP. It could mean the difference between life and death - seriously. You MUST have something dry to change into in case of immersion. I also recommend bringing something to reliably start a fire in an emergency scenario.

5. Wear a Watch. Shorter days will give you much less of a buffer for your return trip, and you want to get back before dark. Darkness will only add another layer of danger to a challenging paddling scenario. Wear a watch, check it often, and head back with plenty of daylight to spare.

You can enjoy serene paddling through beautifully stark landscapes here in the northeast in late autumn. After the leaves fall, vistas open through bare tree limbs that bend and hang like modern sculpture. The angle of the light casts long shadows that ripple under the stroke of a paddle blade, and the still air invigorates as it chills your lungs. The world becomes more elemental, and to me, in some ways more beautiful - as nature dies and sleeps, and waits to be reborn.

Plan for it properly, then you too can slide quietly across its cold smooth waters.

TB on the Water 


Wednesday, October 25, 2017

Gear: Keeping Your Stuff Dry - 5 Tips for When You Don't Want it Wet

Kayaking is a water sport. Things are going to get wet. Your boat, your paddle, maybe even your gloves and clothing - all are subjected to water exposure, and are meant (or should be) to function well when submerged in, or washed over by, water. However, there are items you may want to bring on your paddle trip that you do not want to get wet, or frankly are not designed to survive water exposure. Your mobile phone comes to mind, as an example. Beyond that, snacks, a dry towel, a change of clothes, matches, a map - these are examples of items you want to keep dry. Doing this may be a little more complicated than it might seem, so here's some tips from my experience to make keeping your stuff dry easier and more effective:

1. Store Items for Accessibility. How often and how easily you need access to an item will determine where you locate it on or in your kayak, and therefore will influence how you keep it dry. Items that you need to access only in case of emergencies (like a dry change of clothes, or matches/a lighter to start a fire) can be stored in forward or aft bulkhead compartments, which is your first line of defense in keeping them dry. Items that you might want easier access to (like a camera) can be stored in some kind of dry bag or deck bag located within reach.

2. Use Multiple Layers of Protection. I bring a cell phone with me on my paddle trips for emergency communication, and also to take occasional pictures when I land on an island  beach or some other temporary rest stop. Because I don't need ready access to it while paddling, I store it in my forward compartment, which is sealed by a tight fitting hatch - protection layer #1. Inside the compartment, the phone rests inside a dry bag - protection layer #2, and inside the dry bag, I keep my towel wrapped around my phone - protection layer #3. I could even go so far as to put the phone inside a water resistant case, then inside the towel, then inside the dry bag, and so on. You get the picture. Use multiple layers in case an outer layer fails.

3. Consider Inflatable Dry Bags. Once I discovered that the bulkheads in the interior of my sit-on-top touring kayak were not water tight, I opted to add inflatable dry bags to each compartment (see my post Kayak Repairs That Last). These are meant to perform double duty as dry storage bags and float bags to give my kayak additional buoyancy should it take on water (especially since the bulkheads are unreliable). These bags come with a stem that you blow air through to inflate the bag. They have the same kind of fold over, gasketed bag opening that standard dry bags have. Once you have them filled, and the opening folded closed and clipped with the attached buckles, you can use the air stem to inflate them. This adds a positive pressure to the interior of the bag that makes water less likely to penetrate. I find they hold the air pretty well, so long as the opening is folded tightly, and the stem cap is twisted on tight. 
https://cwkayaker.blogspot.com
Inflatable Kayak Dry Bag

4. Make Sure Your Hatch Covers Fit Tight. Your hatch covers are your first line of defense for items stored in compartments. They work to keep water washing over your deck from getting inside the compartment, or for keeping water out of the compartments should your kayak capsize or roll. Their function is as much for safety as it is for storage, so make sure your hatch covers fit tight. There are a variety of designs - some are held tight by straps and buckles, some snap on over a lip in the compartment opening, some have a neoprene membrane that pulls tight over the opening and under the cover, and some lock or screw inside a ring that is mounted to the deck. Carefully examine the design of your hatch covers, and make sure all their elements are functioning properly and are fitting securely. If yours fit inside an attached ring, make sure the ring is sealed and screwed tight to the deck. Apply fresh sealant once per season, or otherwise as needed.

5. Consider Upgrading to Waterproof Gear. If your goal is to capture multiple images of your in-progress paddle trip, maybe you should consider a waterproof camera, or a GoPro. Maybe a marine radio is a better choice for emergency communications. Any gear that's designed to be wet, especially items designed to be submerged, will fair better in kayaking conditions. The more precious the item, the more you need to ensure it can withstand the water. 

Getting wet is part of the fun of being in or on the water, so long as you're drying off fast enough to stay safe (see my post 8 Tips for Dressing Right for Your Kayaking Adventure). Keeping some of your stuff dry, though, is imperative. Use the right gear, protect it in multiple layers, and batten down the hatches. And, if you don't think you'll need it for safety or comfort, leave it back on dry land.

- TB on the Water


Wednesday, October 11, 2017

Gear: 5 Tips for What You Should Own, Even if You Only Rent Kayaks

In previous posts like 10 Tips for Which Kayak You Should Buy, I suggested some people might not be up for the challenge of owning and transporting a kayak, or might not have the facilities to store and maintain one. However, that does not necessarily mean they can't enjoy kayaking from time to time. There is an abundance of kayak rental shops popping up - many of which offer guided tours, or "create your own adventure" hourly rentals (see my post "Florida Day" - Our Florida Paddle Adventure). In many cases, the rental shops are located adjacent to a body of water where you can paddle, or they have the ability to drop a kayak at the location of your choice. I've stated my preference for sit-on-top kayaks (see my post Benefits and Weaknesses of Sit-On-Top Kayaks) for safety - especially for inexperienced paddlers. Asking if this type is available from a rental shop is a good idea. I have also stated my aversion to tandem kayaks, but for a rental, this option is reasonable, as you won't be lugging around a heavy tandem as your own full time 'yak. 


kayak flat water
A rented kayak can get you here...

OK, so you've decided you might want to go kayaking a few times a year - which may not be a sufficient quantity of paddle trips to justify owning a kayak, but is a sufficient quantity to consider owning some gear that could greatly improve your paddling experiences. So, here's a list of items you should consider owning if you intend to paddle rented kayaks on a regular basis:

1. A Paddle. Paddles are provided with kayak rentals, but they are often cheaper, possibly adjustable, models with run of the mill materials and blade design. There's nothing wrong with them. Compared to a carbon fiber shaft with offset hand positions and low drag blades, however, they are the equivalent of driving a family sedan versus a high performance sports car. Your grip will be easier, especially over time, with a high end paddle. Your paddle speed will be better. You will get less fatigued. You will paddle more efficiently. You buy a paddle sized for your body, so there is no mistaking you are paddling with the proper paddle length. And, for the vain among us - they look cooler. There is a down side, though - they are expensive. You are probably looking at a couple to a few hundred dollars for a good high end paddle, depending on the materials. Aluminum shaft is the low end, fiberglass is better, carbon fiber is best. Wood is robust, but can be heavy - check the weight. Wood blades (like on this model) can be buoyant, which can help over a long paddle. If you get sized for a model and figure out what length you need, you might find a used one on Craigslist or eBay, but buyer beware. Make sure they are not damaged. Solid shaft paddles can sometimes leak where the blades are inserted, so shake the paddle and listen for water. Shafts you can disassemble often have springs that can break or become dislodged. Check to make sure everything works right. There is no getting around the research. Read about blade types, materials, shaft shapes (some are oblong if you cross sectioned the shaft, not just circular - for an easier grip). Read my post 5 Alternative Paddle Strokes. Take your time determining which paddle will work best in the areas you will be paddling. If you decide to purchase a paddle, your research will have been worth the effort - and don't forget the paddle leash!   

2. A PFD (personal flotation device). A PFD (life jacket) will almost certainly be provided or available from a kayak rental shop, but like a paddle, having your own can have some benefits. You can make sure that your PFD fits your body type well - which means snug and secure, so it doesn't slide up over your head if you end up in the water. You can look for additional features - like pockets and reflective materials. Just like with a paddle, do your research, read reviews, and then go try them on to find the perfect PFD for you. Heck, you can even pick your favorite color (consider something bright that can be seen easily on the water, like this one). A good PFD will serve you in all water related activities, so it can be used beyond kayaking - which is one more reason to consider owning yours. 

3. A Sun Blocking, Water Resistant Hat. A hat is another item that can serve you in activities beyond kayaking, but you will surely want one when you're on the water. The sun can beat down on you mercilessly when there's no cloud cover. Even with some clouds, sunburn can occur much quicker than you might expect. Get something with a broad brim that gives good coverage. You can go so far as a model that offers accessories, like a rear flap over your neck (see my post 8 Tips for Dressing Right for Your Kayaking Adventure), but at least get something that will cast a substantial shadow over your head and face. Consider what other outdoor activities might benefit from which type of hat you choose - maybe one with some ventilation, so it doesn't get too hot off the water. You should probably choose a lighter color as well - dark colors get hotter in the sun.  

4. A Dry Bag. Kayak rental shops may or may not have dry bags available, but they are invaluable for safe protection of items you don't want to get wet - like your wallet, your cell phone, a dry change of clothing, paper maps, etc. You might consider additional water tight carriers for things like your cell phone as a back-up in case the dry bag leaks. You can use a dry bag anywhere on the water - bring one along on a boat trip for piece of mind, for instance. I recommend a model with a see through panel, so you can see inside without having to open it, and a bright color, so it's easy to find and identify. Mark your name and contact info. on it as well with a permanent marker, in case you accidentally leave it behind somewhere. They're great for camping, too - to protect items from rainfall. 

5. Eye Protection. Eye protection (UV rated sun glasses) are necessary in many outdoor activities, but especially so on the water. The reflected light can cause squinting, and can impede your vision - which is very bad for safety. You want to be able to see approaching power boats or jet skis - as well as surface indicators of currents, water hazards, etc. Keep in mind you may lose your glasses though, so consider a cheap pair (and maybe a back-up cheap pair) or some foam floats that attach to the stems via a neck loop. 

I'm going to give an honorable mention to clothing. On your rental kayak paddle, wear clothing that dries easily if it gets wet, and will keep you warm, wet or not. This is typically synthetic, moisture wicking fabrics. Jeans and cotton fabric items are not a good choice - nor are any items that are heavy when wet. I'm also giving an honorable mention to some kind of hand protection (gloves), especially if you are prone to blisters. These should also be made of a material that performs well in water. Finally, I'd like to emphasize safety. If you do not feel confident in your skills, go with a tour. Even if you do feel confident, don't go alone. A few paddle trips a year will not make you an expert, so use the buddy system, and be conservative with your choice of paddling location and conditions. I strongly suggest viewing some online safety instructional videos for re-entry into a capsized kayak - and maybe even taking a class if one is available near you. Here's a great video that shows how your paddle buddy can help you re-enter your kayak:


Renting a kayak is a great option for those not interested in the work of owning, maintaining, and transporting one. If you plan to do it on a regular basis, though, owning a few key items that you can transport easily (and might be useful for other outdoor pursuits) could make your paddling experiences even better.  

Whatever quantity of time you get to spend paddling, it's the quality that really counts. Make yours as good as it can be. See you on the water.

TB on the Water        

Wednesday, September 27, 2017

Milestone: CWK Celebrates its 30th Post!


When I started this blog, I must admit, I had no firm idea where it would go. I knew I had some advice that might be useful - especially for beginners. There are plenty of kayakers out there who have a great deal more experience and expertise than I do, but I still see some value in adding my voice to the conversation. On many occasions, when the topic of kayaking came up in general small talk, I found myself answering questions for folks who seemed unaware of the basic requirements for safe enjoyment of the sport, and who (let's face it) probably won't ever really get into kayaking in anything but a casual way. That's fine. I have no problem with people recognizing they don't have the time or interest level to fully commit to any particular activity. I enjoy kayaking and waveski surfing (see my post What's That Thing Called? (it's a waveski)), but I work a full time job and have limited hours to spend on each pursuit. Surfing has shifted into the forefront of my water activities in recent years - I can get to my usual break in less than an hour, surf for a couple hours, and get back before noontime after a morning surf. I do enjoy the several times a year I get the long boat (what I call my touring kayak) out for a paddle with Tim (see my post Paddle Trip: Choate Island and Crane Beach) or Mike (see my post 5 Tips for Kayak Fishing (once in a while)). The fewer times we can fit touring or fishing paddles into our schedules makes me appreciate the occasional trip all the more. So, I can understand anyone who might have only a peripheral interest in trying out a kayak. I hope the advice I have given in posts like 10 Tips for Which Kayak You Should Buy (hint: maybe none at all) help steer those folks to kayaking opportunities that don't require a huge commitment - like rentals or organized tours, for example. For those who do want to take the next step, I have aimed to provide some advice for lowering the cost of entry to the sport, and the cost of maintenance of your equipment (see my post Kayak Repairs That Last - 10 Tips for Maintaining Your Kayak). I still have some more advice on those topics for future posts, but the post links above, and other posts I have published are a good start for anyone wanting to learn more. I have also linked to other resources that can provide additional information, and I strive to make sure those resources offer the level of quality my readers deserve.

Another aspect of my blog content has been the promotion and appreciation of my local New England coastal waterways. I have been drawn to these waters since my youth (see my post Why I Love the Ocean), and my wish for my last breath would be to release it while gazing upon the shining Atlantic. My love for New England and its waters was only heightened by a brief foray to the southern California coast in the early 1990s. When I drove back across this great country (ostensibly for a temporary visit - and boy, Texas takes a long time to drive across!), I knew, when my eyes caught the glinting morning light reflected through thin ice on Connecticut hardwood trees, that I would never leave. My first gaze upon my beloved Atlantic only confirmed that knowledge. I am a New Englander. It is in my bones, and I hope that condition shines through my posts about local paddle trips and locations. I try to offer as objective a viewpoint as possible, including some criticism of local shortcomings like parking and access to the water (see my post Essex Bay - A Northeast Massachusetts Gem (but where's the parking?)). Let's face it, though, I am a booster for all things New England, and will continue to be. If a reader from another region or part of the world gets a taste for this beautiful coastline from my blog, then I've done my job as I see it.


Rockport, Massachusetts ocean view
The beautiful Atlantic Ocean off New England 

My readership has grown quite a bit since my first post, and it's been interesting to see who's viewing my blog. Of course, the lion's share of views have come from the U.S., but there are also views from many countries throughout the world, on most continents. I hope I represent New England residents, and kayakers more specifically, well. I can imagine a resident of some distant land, who may not have much knowledge of the New England area, having her perspective on the region at least partially shaped by my posts. That idea gives me a sense of responsibility that will continue to inform my writing moving forward.

With the exception of the month of June, 2017, I have been publishing weekly blog posts. Now that 30 posts have been accumulated (a goal I set for myself a few months ago), I will be posting less frequently. I haven't yet fully decided how often that will be, but my Posting Schedule page will list updates to my posting frequency. Less frequent posts may take on a different tone - maybe longer, maybe a series on a specific topic - I'm not quite sure yet. I also want to curate more useful content onto my blog, to make it more of a "one stop shop" for my readers. Whatever form this blog takes in the future, I will continue to strive with integrity to provide my honest viewpoint and perspective on kayaking New England waters.

Thank you to anyone who has visited this blog (or may be visiting now, for the first time). The concept that anyone might find what I have to say useful or interesting is humbling. In an ever busy world, time is ever more precious. Thanks for spending some of yours with me. 

Be safe, take care of your gear, plan your trips well - then get out there and paddle with a song in your heart. Here's to the next 30 posts!

- TB on the Water   


Wednesday, September 20, 2017

Season: Kayak Touring New England Fall Foliage

New England is famous worldwide for its glorious fall foliage. The amazing color variations of leaves during this season include reds, oranges, yellows, greens, and everything in between. Different plant species change color at different times, so the color palette changes over the course of the season, and from place to place. Color change comes earlier in the north, and later in the south, and can also be affected by elevation and micro-climate conditions. When exactly the change begins and ends differs from year to year, and can be affected greatly by the amount of summer rainfall and the weather patterns. So, it's no guarantee any particular year will be ablaze with color variation. Most years, though, reward us with spectacular scenery. 2017 is forecast for a spectacular show (story here). New England fall tourism can generate billions of dollars of revenue for the region. Most people drive to their favorite locations, like the White Mountains, then hike a trail, or stop at a scenic lookout. Folks get out on foliage train ridesboat cruisesbike tours, ATVs - so, why not include kayaking in the fun?


New England fall foliage
New England lakeside fall foliage

One of the great advantages of viewing foliage from a kayak is you'll have much less competition for a prime viewing spot. Unless you're in a busy waterway, you'll have nothing between you and the trees. In some places, you'll be able to paddle right up to, or underneath, them. Another advantage is, well, you'll be in a kayak, enjoying all the benefits kayaking offers the rest of the year. It's just an enhanced version in the fall. Daytime temperatures can remain quite warm during the fall, but will chill as the season progresses. Dressing in appropriate layers is key to comfort and safety (see my post 8 Tips for Dressing Right for Your Kayaking Adventure). Shortened days give you a narrower window in which to enjoy the water, so time your paddle to return well before late afternoon. With proper planning, though, you can enjoy sun filled days with crisp, clean air, amidst a vibrant visual display.  

In order to get close to the best foliage, you might consider a lake or river paddling location (here's a list of rivers from Easternslopes.com). That said, ocean bays and inlets can offer foliage options as well. Either way, chart a course that keeps you close to land, or at least among islands with leaf bearing trees, so you can get a good view. If you plan on taking photos, paddle somewhere quiet and placid, so you can concentrate on getting great shots without sacrificing safe operation of your kayak. I like quiet backwater estuaries that give you the best of all worlds - salt water (and its attendant wildlife) and proximity to the coast. One great example of this scenario close to me is Newcastle, New Hampshire (see my post Newcastle, New Hampshire - a Kayaker's Dream). There are plenty of coastal trees here, as well as trees on multiple islands, and Sagamore Creek is available to get farther upstream and inland. This leads to still waters that reflect the foliage for a great photo subject.


Squamscott River foliage, Exeter, New Hampshire
Fall foliage reflected on the Squamscott River in New Hampshire

Fall fishing can be pretty good, too. Stripers are chasing baitfish all over the New England coastline. You can fish with a view of the glorious leaves as your backdrop. Then, if you land a big one, your buddy can catch the foliage in the background of your show-off pic ๐Ÿ˜‰. Fall is also a great time to beach your 'yak near a trail and take a short hike to view the leaves close up. The bugs are mostly gone, and you won't get overheated in the cool air. Boat safety is better - boat traffic has diminished in most New England locations after Labor Day, but lakes and rivers could still be busy, so practice due diligence.

So long as you dress right, practice proper safety (see my post Safety is a Mindset - 10 Tips for Kayaking Safely), and make sure you time your paddle correctly, the fall is a great time to kayak in New England - and an even better time to enjoy the show the trees put on every year, before they shed their leaves for the long winter sleep. Do yourself a favor: get out there and take advantage of the season for paddling - before your long winter sleep.

TB on the Water


Wednesday, September 13, 2017

Advice: Launching Your Kayak

It seems like a fairly straightforward proposition; paddling your kayak means putting it in some kind of water. However, some consideration and technique can be brought to bear on the specifics of launching your kayak, and I think it's worthwhile to examine what those specifics might be. I briefly touched on launching in my post 10 Tips for Which Kayak You Should Buy, but I'll go into more detail here.
The beginning of your journey

The first thing that always comes to mind when I'm researching a launch location is: are kayaks allowed? Sounds a little basic, right? Consider Lake Cochichewick in North, Andover, Massachusetts - not far from where I live. I've spied this lake as a possible paddling spot for a few years, as it is abutted on its western shore by conservation land, is big enough to offer a couple hours of circumnavigation, and looks like a nice, easy destination to enjoy some fall foliage. After researching this spot, though, I determined that it is suitable only for town residents with closed hull kayaks. Lake Cochichewick is a drinking water supply for several towns. It does offer access to non-motorized boats, but via a town boat launch specified for residents' use. It also requires all boats to not have any possible communication between the water and boat occupants - which means a cockpit drain hole is technically not permitted. So, in this example, kayaks are permitted, but only under specific conditions that don't apply to me and my 'yak. My research saved my a wasted trip and maybe even a fine.

The next thing I think about is parking. I know, the whole idea behind kayaking and other activities in nature is to get us out of our cars and to be surrounded by the natural world. Well, unless you live on a lake, the ocean, or a river, then you're probably going to transport your kayak(s) via a combustion engine. Having a dependable parking spot close to your launch point takes one logistical issue out of your paddle trip. If parking is not close, you will either have to drop your boat at the launch site, then go park, then walk/jog/run back to the water, or, you will need a wheeled kayak carrier to get your 'yak from your vehicle to the launch. In that scenario, you'll have to plan on what to do with the carrier. Does it fold sufficiently to fit inside a hatch? Can you carry it on top of your kayak? Remember, it will add weight, possibly affect you ability to roll your kayak (see my post Safety is a Mindset), and may be subjected to salt water (and therefore, can rust). Also, if you are heading to a new (for you) paddling location, is there more than one parking option? You can't know exactly how busy it will be, or whether any construction or other unforeseen issues will thwart your first choice for a parking spot. Be prepared for unknown parking restrictions (like "resident parking only") as well, and bring quarters for old-school parking meters and a credit card for newer meters. 

After permission/suitability and parking, I think about the launch conditions. Is it rocky or sandy? Will there be mud to slog through? Is the grade to the water a gentle slope, or a steeper drop-off? Do you own a type of kayak you don't want to scratch (it's a good idea to avoid scratching any kayak hull, but fiber glass and wood finishes can be particularly affected by gravel and rocks - which is why my 'yak is plastic ๐Ÿ˜)? Are you launching from a beach, from a concrete boat launch, from a dock? - the type of launch can greatly affect the best practices for getting in the water (still mostly dry ๐Ÿ˜‰) and getting out. Different launch types can favor different kayak types. Dropping a heavy fishing kayak off the side of a dock, for example, can be tricky. Getting into/onto your kayak can be tricky, too. Different techniques are required for different launches. A word here about assisted kayak launches (someone giving you a push): in my opinion, don't do it. I can recall a launch off some rocks in Magnolia where some helpful divers, fresh out of the water, offered to give me a hand launching. They pushed straight into the trough of an oncoming wave, and had, without telling me, folded my rudder on top of my 'yak. I plunged bow first off rocks into an oncoming wave with only my paddle to control the boat. Do yourself a favor - leave your launch timing and gear status to yourself, and fully in your control. Folks may think they're helping, but in the end, it's your ass in the cockpit.    

The most versatile and easiest launch type is a gently sloping, sandy beach near flat water. This can be at the ocean, on a riverbank, or on a lake or pond. The gentle slope allows for an easy carry to the water's edge. If the sand is fine grained, you can drag your kayak with minimal scratching (fussy fiberglass hull paddlers might still want to carry theirs all the way to the water). That said, a 45lb kayak can be a tough drag (or tougher carry) for many people. Wheels will roll easily if they are made for sand. Pneumatic tires work well on sand, but thin, hard wheels - not so much. You can pull your kayak half way into the water, get in it, get yourself organized with your gear, then shimmy yourself forward until you're in water deep enough to float. A couple of paddle presses off the soft sand bottom, and presto, you're on your way. 

Mounting your kayak when it's already in deeper water (like on the side of a dock) means an error could send you splashing into the drink. I personally have unceremoniously tumbled into the water (on a return landing, no less...embarrassment is a great teacher ๐Ÿ˜–).This can be a safety issue in a current, and could float you and your boat away - and away from each other. There are specific techniques for controlling your kayak and bracing off the dock. Here's a video from Paddling.com that shows you how to do it...


Steep drop offs into deep water and rocky launch points add another level of difficulty, so choose a launch that suits your ability. Launching into the surf is for advanced paddlers and deserves a post of its own, so I won't go into it here, aside from saying don't do it unless you have a spray skirt deployed or are on a sit-on-top kayak and know the paddling techniques required to safely punch through waves. Do your research, and practice in small surf first. Getting tossed by waves in a touring length kayak is no joke - it could break your neck. Landing in surf conditions is even more challenging. So, avoid surf launches unless you are advanced. 

Another consideration for your launch point is what will the conditions be like when you return from your paddle? If the tide goes out and leaves nothing but thick mud between you and your landing, that could be a long, hard slog. You might even get stuck. I have lost footwear in thick mud. Trust me, you want to avoid it. This is one reason why known boat launches are good candidates. They have already been vetted for changing tide levels. Launching into a river current might be easier on the entry - the return could require landing at speed. Coming into a dock at the speed of the current can be difficult - you don't want to get smashed into the side of it, or dragged under a gangway.

Like most aspects of kayaking, selecting the right launch may be a bit more complicated than it first appears, but don't let that intimidate you. Your launch point is where you leave your terrestrial life behind and slide onto liquid. It's the gateway to your kayaking adventure, and the port that welcomes you home. Consider it thoroughly, choose wisely, then leave the land and its troubles behind you - at least for a little while.

- TB on the Water  


Wednesday, September 6, 2017

Location: The Mouth of the Danvers River & Nearby Islands

I'm not going to write about a specific paddling trip to this area in this post, but I have paddled its waters on several occasions, including while casting for stripers. Both Tim (see An Unexpected Adventure) and Mike (see 5 Tips for Kayak Fishing (once in a while)) have set out on these waters with me, and we have launched from a few different spots - exposing us to its varying conditions. While the body of water surrounded by the shores of Beverly, Manchester-by-the-Sea, Magnolia, and Gloucester to the north, and Salem and Marblehead to the south is technically part of Massachusetts Bay, its seems like it should have its own name - but I haven't found one. The Danvers River drains into this waterway from the west, and open ocean lies east of Gloucester and its opposite, Marblehead. There are several harbors adjacent to these waters, including those at Gloucester and Manchester-by-the Sea on the north side, and those at Salem and Marblehead on the south side. Islands lay from north to south, including Misery Island, which is a Trustees of Reservations property and offers hiking trails and seasonal restroom facilities, should you need to stretch your legs. Crowninsheild Island is also a Trustees of Reservations property, but is on the south side of the waterway - just outside of Marblehead Harbor. It's small, with no amenities, but could be a great base for some kayak fishing, or as a rest stop before heading to other islands farther into the bay.


This area, in my opinion, is not suitable for beginner kayakers. In fact, experienced kayakers would do well to take the conditions here seriously. There have been kayaking fatalities in these waters. Currents can be very strong. I was caught in the Danvers River current on one trip with Mike, and had no option but to paddle hard toward the Marblehead shore to keep from getting swamped. Crossing currents drove random waves over my bow, and it took all my skills and 45 minutes of paddling to get me out of the current. Even Salem Harbor can have strong currents depending on the tide conditions. The wind chop can get challenging there as well. Paddling to islands farther into the bay will take you over deep water - far from land and in near open ocean conditions. I would not recommend paddling far from shore alone. As in all paddling trips, give thorough consideration to all safety related preparations (see Safety is a Mindset), especially in this area. These waters are not to be taken lightly. If you would like to stay in calmer areas, then Marblehead Harbor and the coastline along Beverly should work. Salem Harbor and Gloucester Harbor are more challenging, and paddling to any of the islands (other than Crowninsheild Island) is more advanced.  

Parking can be tricky depending on your launch point, but, given the vast surrounding coastline, options can be found throughout. Decide where you will launch, then check out the town website (links are in the first paragraph) for boating access. Some locations may charge a fee. I also use Google Maps (like the one above) to scan coastlines for possible launch locations. If you're lucky, you can find a small beach area with nearby free parking that will suffice. 

Boat traffic can be heavy in the harbors, so keep your head on a swivel there. Powerboats don't always follow "no wake" rules, and will wash you with wake waves. Stay out of the main boating lanes, or cross them quickly when there is a lull in the traffic. Sail boats have the right of way, so give them a wide berth.


Marblehead Harbor
These waters are deep and cold outside of the harbors, so dress appropriately - the wind over the water will be substantially cooler than back on shore. Plan for plenty of time to get where you're going. The islands can appear closer than the actual time it takes to paddle to them. This area is to be enjoyed in smaller bites - then, with experience, you can push your paddling to make a bigger meal out of it. This coming fall could provide great weather for enjoying this area, but it won't last long. Shorter days will bring the temperatures down quickly. Viewing foliage from a kayak, however, is a beautiful thing indeed (see my post Kayak Touring New England Fall Foliage). Afterward, you can stop in Salem for a pint and some beer snacks at Notch Brewery & Tap Room.

I always try to treat this waterway with the respect my experience here has engendered. That being said, if you have skills, plan correctly, and paddle with company, these waters offer a rugged adventure with remote island beaches that can put you in another world.

- TB on the Water                      


Wednesday, August 30, 2017

Paddle Trip: Choate Island and Crane Beach (Essex Bay)

Recently, my paddling co-conspirator Tim (see my post An Unexpected Adventure) and I enjoyed a leisurely 3 hour tour around Choate Island (formerly known as Hog Island) in Essex Bay (see my post Essex Bay - A Northeast Massachusetts Gem). This is an area I revisit regularly due to its shear beauty and kayak friendly (aside from parking options) conditions. You'd be hard pressed to locate a better kayak touring location than this area. It's big enough to offer wide ranging trip options, has plenty of protected back waters to keep you out of the power boat lanes, is abundant with wildlife, and has a few spots to stop and stretch your legs. Every time I paddle here, I seem to encounter something new, and this paddle trip was no exception.
Long Island, Essex view
Looking East toward Crane Beach from Long Island 

We left from Conomo Point in Essex as we typically do. The tide was low, but inbound. This rendered the beach, from where we often launch, far from any water - other than small creeks formed in the muddy bottom. We opted to try another launch point over the hill near Clammer's Beach that was closer to the water with more gravel than mud. The few parking spots there are designated for resident sticker parking, but one spot was available to temporarily park and offload the boats. Tim stayed with them while I drove my truck back to park beyond the "resident sticker only" parking sign on Conomo Point Road. I jogged the 1/4 mile back to the beach, and we were able to get on the water by about 10:00am. The morning breeze was off the ocean, and felt cool and refreshing as we paddled around the south side of Dilly Island, and angled toward deeper waters. We hit a shallow patch, and had to drag the 'yaks 30 feet or so, but found water deep enough for our paddles as we headed east along Dilly Island and into the deeper channel that clammers use for powering their outboards out to the clam flats. We saw 2 clammers raking hard, nearly knee deep in the mud wearing their rubber boots and with backs bent to drag clam rakes. A white, long legged wading bird, which I took to be some king of heron, and may have been, more specifically, a Great Egret, stalked through the shallows to our left eyeing minnows for breakfast.

Deeper water increased our paddling speed, and we rapidly left Dilly Island behind, proceeding to the back side (west side) of Crane Beach. At full low tide, which this was approximately, the deep water is confined to a channel running parallel to Crane Beach, which descends steeply into the water here, contrasted to the gradual grade decline on the ocean side. The currents can be strong in this channel, and a paddler should pay attention. A couple of power boats were carrying a few fishermen each, who were casting for stripers in the deeper water. We kept to the shallower side of the channel, and paddled among some pleasure boats that were anchored in what I guessed was about 10'-12' of depth. 2 guys in waders were hip deep in water closer to the nearby island, and looked like they were fly casting. Soon after we passed them, we made our way to the gravel beach next to the dock on Long Island - which runs adjacent to Choate Island. I have heard the dock was upgraded (around 1995) for delivering equipment and personnel used to film the movie The Crucible. Now, the islands (dock included) are the property of the the non-profit Trustees of Reservations, who's mission is to "care for more than 100 special places - nearly 25,000 acres - all around Massachusetts" 


Dock at Choate Island
The dock at Long Island

After a brief respite on the beach near the dock - to take some pictures and stretch our legs, we climbed back into the 'yaks and paddled across the channel again to the Crane Beach side - to check out the dock there, and saw another heron - this time a Great Blue Heron, stroking its huge wings along the shore in seemingly slow motion. The blue color of its wing feathers was striking. We crossed the channel one more time, and headed toward the west side of Choate Island. The tide was well inbound now, and the marsh creeks behind the island were deep enough to afford smooth paddling for the most part. I noticed a platform installed to encourage the nesting of Osprey. This one had a nest on it (the birds come back to the same nest location year after year, but a nest does not necessarily mean birds are currently using it). A few minutes later, I heard the telltale call of an an Osprey, and saw one land to roost in a tall pine tree on the hill near the west side of the island. I always enjoy seeing these raptors - it's a good sign of the overall health of the local environment; they survive on fish as their primary food source.  


Hilltop on Choate Island
The hilltop on Choate Island

We paddled through the marsh creek west of Choate Island and back south toward the Essex River mouth. It was here that we had the most unusual encounter of the day. As we moved along the shore of Corn Island and Dilly Island (this time on its north side), I heard a splash to my left and caught the last of some white water out of the corner of my eye. At first, I thought it had been some kind of a wave, but I quickly realized the minimal wind chop was not nearly big enough to break, and it had to be something else. Then, I thought something must have breached the water. What I had seen out of the corner of my eye, though, made too big of a splash to be a striped bass. I asked Tim if he saw anything, but he hadn't. Just then, as I looked past Tim farther into the river, I saw the shiny black head of a seal. "It must have been that seal", I said, pointing Tim's gaze in its direction. We watched the seal as it watched us back. Then, its shiny head slipped under the surface. Half a minute later, Tim and I both saw another splash - this time an explosion of fish leaping free of the water to escape the pursuing seal. I had never seen a seal feeding like this, and it was a revelation. Tim glided over to the area where the fish had leaped into the air, and soon after, another watery explosion of fish happened not more than 12 feet from him. This repeated a couple more times until a motor boat approached and the seal spooked. This was a surprising highlight of our paddle, and another example of how nature can show you something new every time you look. 

By the time we got back to Conomo Point, the tide had risen sufficiently to land at the usual beach spot on the south side of the point - which made for a slightly shorter walk back to my truck. This paddle was everything a relaxed kayaking trip should be: fresh air, beautiful surroundings, and a nature show to cap it off.

I still think the town of Essex is missing an economic opportunity by not having easier kayaking access to Essex Bay, but maybe that's what keeps it so special. I, for one, will continue putting in the work to get in the water there, and to enjoy all that it has to offer.

- TB on the Water